
Can Maintenance Staff Install Frame Patches: A How-To Guide
Table of Contents
- Can Maintenance Staff Install Frame Patches: Authorization and Competency
- Assessing Frame Damage Severity and Repair Needs
- Door Frame Patch Installation: Step-by-Step Process
- Selecting the Right Door Jamb Repair Kit
- Door Frame Repair vs. Replacement: A Decision Tree
- Commercial Door Frame Repair: Safety and Compliance
- Common Installation Mistakes and How to Avoid Them
- Frequently Asked Questions
Last Updated: October 5, 2026
Can Maintenance Staff Install Frame Patches: Authorization and Competency
When properly trained and authorized, maintenance staff install frame patches successfully, but liability, training, and escalation protocols are critical. This guide covers the qualifications needed, installation process, and decision framework to keep your facility safe and compliant.
Understanding Staff Qualifications and Liability
Frame patching differs from routine maintenance, it requires assessing structural integrity, safely removing deteriorated material, and ensuring durability. Your staff needs specific training and authorization before beginning work.
Here's what qualifications typically look like:
- Basic understanding of frame damage types (rust, rot, structural compromise)
- Training on the specific patch kit your facility uses
- Ability to inspect work and identify when escalation is needed
- Documentation of training completion
- Authorization from facility leadership or your maintenance director
Insurance carriers often require documented training before staff perform structural repairs. Check your policy for specific requirements, this prevents costly liability issues.

Training and Certification Requirements
Basic training covers damage identification, patch assessment, kit-specific installation, safety procedures, inspection criteria, and documentation. Door Innovation provides guides with every kit.
Assessing Frame Damage Severity and Repair Needs
Before any installation happens, your team needs to assess the damage. This step determines everything: whether a patch works, which patch kit to use, and whether you need professional help instead.
Identifying Types of Frame Damage
Frame damage falls into three main categories: surface rust, localized damage, and structural compromise. Each requires a different response.
Surface rust (discoloration, light corrosion) can be addressed with a small patch kit. Localized damage (rust concentrated at frame bottom) is ideal for patching, the surrounding frame remains sound. Structural compromise (twisted, cracked, multi-area deterioration) requires full replacement, never patching. Patches only work on structurally sound frames.
Determining Localized Damage vs. Structural Compromise
When inspecting, ask: Is damage contained to one area? Is the frame square? Does the door close and lock properly? If damage is localized to the bottom (less than 2 inches deep) and the frame is square and functional, patch it. If damage spans multiple areas, the frame is twisted, or the door malfunctions, escalate to professional assessment or plan replacement.
Door Frame Patch Installation: Step-by-Step Process
Once your team has assessed the damage and determined that patching is appropriate, the installation process is straightforward. Most patches install in under an hour with basic hand tools.
Pre-Installation Inspection and Material Removal
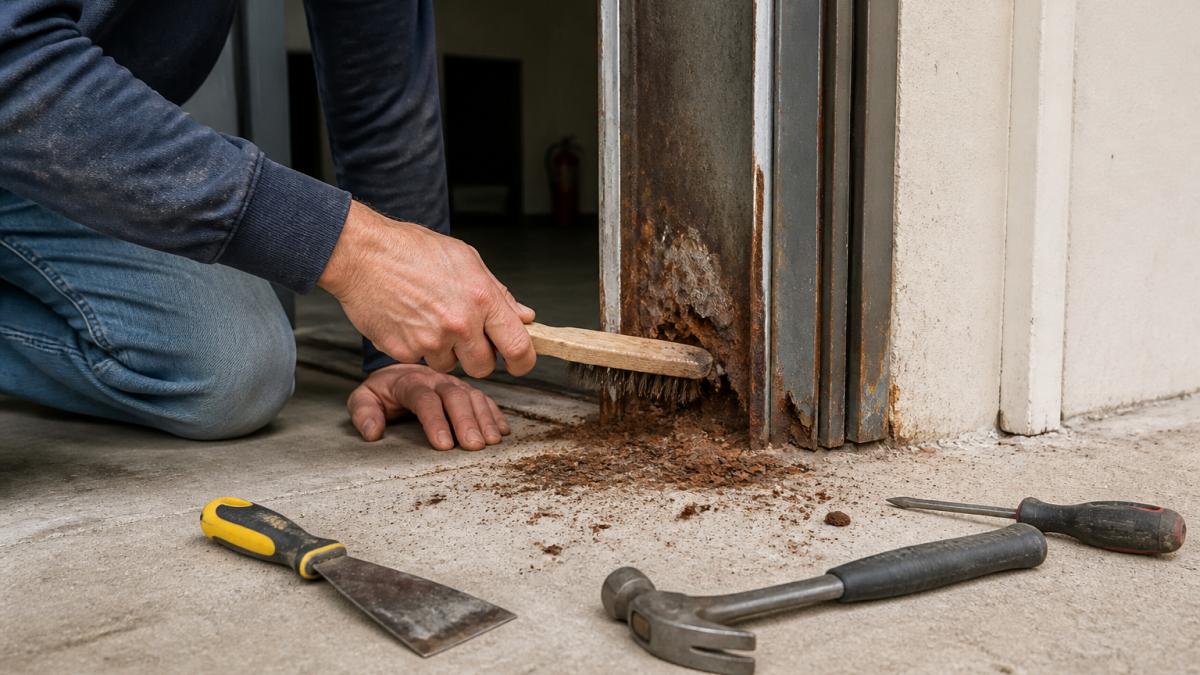
Remove any loose material, rust debris, or deteriorated wood, a patch won't hold otherwise. Clear the work area and remove the door if possible. Use a wire brush to remove loose rust and corrosion, exposing sound material. If damage extends deeper than expected, reassess whether patching is appropriate. Clean the surface thoroughly and confirm damage matches your patch kit's specifications.
Securing and Sealing the Patch
Position the patch over the damaged area, overlapping sound frame material on all sides. Mark fastener holes using the patch as a template, drill pilot holes, and install fasteners firmly (do not over-tighten). Apply sealant around all edges to prevent water infiltration, this is critical for longevity. Allow sealant to cure per manufacturer instructions (typically 24 hours), then reinstall and test the door. Door Innovation Jamb Patch kits include hardware and instructions. Strike Side and Hinge Jamb Patches ($180.91 each) address larger rust areas; the 4" Jamb Patch Kit ($130.37) handles early-stage corrosion.

Selecting the Right Door Jamb Repair Kit
Choose the correct kit based on damage location and severity. Door frames have two main repair locations: strike side (where the latch engages) and hinge side (where hinges attach).
Strike Side Jamb Patch ($180.91): Use when more than 2 inches of rust is evident at the bottom; non-handed design works on left or right openings. Hinge Side Jamb Patch ($180.91 each, left or right hand): Includes 4-1/2" commercial hinge pocket; select the correct hand for your door. Jamb Patch Kit (4") ($130.37): Two 4-inch patches for early-stage corrosion. Choose based on damage location and severity.

Door Frame Repair vs. Replacement: A Decision Tree
Not every damaged frame should be patched. Sometimes replacement is the right choice. Understanding when to patch and when to replace saves money and prevents future problems.
When Patching Is the Right Choice
Patch when damage is localized, the frame is structurally sound, deterioration is less than 2 inches deep, and surrounding material can support fasteners. A patch extends frame life for $180 plus labor, far less than replacement. For multiple damaged doors, patching most and replacing the worst cuts maintenance costs significantly.
When Full Replacement Is Necessary
Replace when damage is widespread, the frame is structurally compromised (twisted, cracked, leaning), the door malfunctions, deterioration exceeds 2 inches deep, fasteners won't hold, or standards are being upgraded. Patching compromised frames fails quickly. Decision rule: localized damage on sound frames = patch; widespread or compromised frames = replace.
| Condition | Best Action | Why |
|---|---|---|
| Localized rust, bottom of frame | Patch | Patch solves the problem, extends life 5-10 years |
| Widespread rust, multiple areas | Replace | Patch won't hold, replacement is permanent solution |
| Frame twisted or not square | Replace | Patching won't restore structural integrity |
| Early-stage corrosion | Patch | Catches problem early, prevents larger damage |
| Door no longer closes properly | Replace | Frame damage is affecting function, replacement needed |
| Budget constraints, one or two doors | Patch | Patch is cost-effective temporary solution |
| Multiple damaged doors (10+) | Mix of both | Patch worst cases, replace worst cases |
Commercial Door Frame Repair: Safety and Compliance
Commercial facilities operate under different rules than residential buildings. Safety, security, and compliance are non-negotiable. Your frame repairs must meet those standards.
Safety Procedures and Hazard Controls
Hazards include rust particle exposure (use gloves and dust mask), tool injuries (proper handling and PPE), structural failure if frame is severely damaged (secure or remove door), chemical exposure from sealants (ensure ventilation), and fall hazards at height (use fall protection). Healthcare facilities, schools, and senior living communities may have additional safety requirements, check your facility's protocols.
Inspection, Documentation, and Acceptance Criteria
Once the patch is installed, inspect the work before considering it complete. Documentation protects your facility and creates a maintenance record.
Inspection checklist:
- Patch is secure and fasteners are tight (but not over-tightened)
- Sealant is applied around all edges and has cured properly
- No gaps between patch and frame
- Door closes and locks smoothly
- No visible deteriorated material remains around the patch
- Fasteners are not protruding or creating a hazard
- The repair is clean and presentable
Document the repair:
- Date of repair
- Location (building, floor, door number)
- Damage type and severity before repair
- Repair method and materials used
- Staff member who performed the repair
- Inspection results
- Expected lifespan of the repair
This documentation serves multiple purposes. It creates a maintenance history for the facility. It protects your staff by showing that repairs were done properly. It helps with insurance claims if needed. And it informs future decisions about whether to patch or replace.
For healthcare facilities and other regulated environments, documentation becomes part of your compliance record. Inspectors want to see that repairs were done properly and that facilities are maintaining their buildings to standard.
Common Installation Mistakes and How to Avoid Them
Most installation problems come from rushing the process or skipping the assessment step. Here's what goes wrong, and how to prevent it.
Mistake 1: Installing a patch over loose material. The patch won't hold if the surface beneath it is deteriorated. Always remove loose material completely. If you find that damage extends deeper than expected, stop and reassess.
Mistake 2: Using the wrong patch kit for the damage. Each kit is designed for specific damage types and locations. Using a 4-inch patch on a large rust area wastes the patch and leaves damage unaddressed. Assess the damage first, then select the appropriate kit.
Mistake 3: Over-tightening fasteners. Fasteners should be snug, not cranked down with all your strength. Over-tightening can strip threads, bend the patch, or crack the frame around the fastener. Snug is enough.
Mistake 4: Skipping the sealant step. Sealant prevents water from getting behind the patch and causing more rust. Without it, the repair fails faster. Apply sealant around all edges and allow proper cure time.
Mistake 5: Patching a structurally compromised frame. If the frame is twisted, cracked, or no longer square, a patch won't fix it. The frame needs replacement. Patching a compromised frame creates a false sense of security and will fail under normal use.
Mistake 6: Not testing the door after repair. Always operate the door after the repair is complete. The door should close smoothly, latch properly, and not bind. If it doesn't, something went wrong with the repair.
Mistake 7: Forgetting documentation. Document the repair before you move to the next task. If you wait, details get fuzzy and documentation becomes incomplete. Make it part of the process.
Avoiding these mistakes comes down to following the process: assess the damage, select the right kit, prepare the surface properly, install the patch carefully, seal the edges, allow cure time, test the door, and document the work. Rush any step and problems follow.
The question of whether maintenance staff can install frame patches has a clear answer: yes, when they're properly trained, authorized, and equipped to assess damage and recognize when escalation is needed. Your facility doesn't need to replace every damaged frame.
Door Innovation's patch kits and installation guides make this process straightforward. Start with proper assessment, use the appropriate kit for the damage, follow the installation process carefully, and document everything.
OSHA guidelines on workplace safety and hazard controls
American National Standards Institute standards for door frame installation
National Association of Certified Inspectors guidance on commercial facility maintenance documentation
Frequently Asked Questions
Can maintenance staff install frame patches without special certification?
Yes, maintenance staff can install frame patches if they receive proper training and follow manufacturer instructions. Door Innovation's jamb patches are designed for straightforward installation by facility teams. However, staff should understand frame damage assessment, material compatibility, and safety procedures. For complex structural damage or frames with more than 2 inches of rust at the bottom, professional evaluation is recommended. Facilities should document staff training and verify competency before assigning frame repair tasks independently.
What tools and materials are needed for door jamb repair kit installation?
A door jamb repair kit comes complete with the patch, installation hardware, and fasteners. You'll need basic hand tools including a drill, drill bits, wrench, and possibly a grinder to remove deteriorated material. For rust removal, a wire brush or rust dissolver helps prepare the surface. The kit's instructions specify exact requirements. Most installations take 2-4 hours per door, depending on rust severity and frame condition. Ensure staff have personal protective equipment including gloves and eye protection when removing deteriorated material.
How do you know if a door frame patch will hold up long-term?
Durability depends on proper surface preparation, secure fastening, and addressing the rust source. After installation, inspect the seal quarterly to ensure no moisture re-enters. Document the repair date and condition.
When should maintenance staff escalate frame repair to a professional?
Escalate to a professional if the frame shows structural damage like twisting or cracking, if rust extends beyond localized areas (more than 2 inches at the bottom), or if the door opening's structural integrity is compromised. If staff lack training or confidence after reviewing instructions, professional assessment ensures safety and liability protection.