
Heavy Duty Door Frame Anchor Installation Guide
Table of Contents
- Tools and Materials for Heavy Duty Door Frame Anchor Installation
- Hollow Metal Door Frame Anchor Types and Wall Substrate Selection
- Step-by-Step Installation Sequence for Base and Snap-In Anchors
- Door Frame Repair Kits for Rusted Steel: When to Repair vs Replace
- Commercial Door Frame Installation Best Practices for Shimming and Alignment
- Common Installation Mistakes and Visual Troubleshooting
- Maintenance and Long-Term Inspection After Installation
- Frequently Asked Questions
Last Updated: September 16, 2026
Tools and Materials for Heavy Duty Door Frame Anchor Installation
Heavy duty door frame anchor installation starts with a short, specific tool list, and most crews already own every item on it. At Door Innovation, we've seen how staging the right hardware before touching the frame can significantly speed up a jamb repair.
Gather these before you start:
- Cordless drill with a 1/4-inch hex driver and a masonry bit set if you're anchoring into concrete
- Hammer drill for concrete or block substrates
- Level (24-inch minimum) and a framing square for checking plumb and square
- Shims in assorted thicknesses, plus a flat pry bar for fine adjustments
- Anchor kits sized to your jamb configuration (side jamb vs. center jamb)
- Safety glasses, work gloves, and a vacuum for clearing drilled holes
Hollow Metal Door Frame Anchor Types and Wall Substrate Selection
Matching the anchor to the wall substrate is the single decision that determines whether a repair lasts a year or a decade. Most guides list anchor types in the abstract; the useful version is a decision you can make standing in front of the opening with a drill in your hand.
Substrate Decision Matrix
| Substrate | Anchor to use | Why it works | Watch out for |
|---|---|---|---|
| Poured concrete | Concrete screw or sleeve/expansion anchor | Expansion bites into the concrete mass; high pull-out resistance | Hole must be drilled to the correct diameter and depth; blow dust out before seating |
| Concrete masonry unit (CMU/block) | Expansion anchor into the grout-filled cell, or a toggle-style anchor into a hollow cell | Grout-filled cells hold like concrete; hollow cells need a back-side bearing anchor | Never anchor into a mortar joint, it crumbles under load |
| Steel stud with drywall wrap | Snap-in anchor or jamb anchor kit tied to the structural stud flange | Ties the frame load to the stud, not the drywall | Confirm you're hitting the stud, not just the drywall; use a stud finder or probe |
| Wood stud | Lag-style fastener or heavy-duty structural screw | Threads bite into solid wood grain | Pre-drill to avoid splitting the stud, especially near the end |
| Corroded aluminum frame | Bolt-on jamb anchor kit | Re-establishes the frame-to-wall connection without welding | Clean corrosion first; the kit needs sound metal to bear against |
How to Identify Your Substrate Before You Order
If you're not sure what's behind the jamb, drill a small pilot hole at an anchor location and read the spoil:
- Fine gray or white powder with hard resistance: concrete or grout-filled block.
- Gritty, sandy spoil with inconsistent resistance: hollow CMU.
- Thin metal shavings after passing through drywall: steel stud.
- Light wood-colored shavings: wood stud.
Load and Spacing Considerations
Anchor spacing is not arbitrary. Most frame manufacturers publish a maximum spacing along the jamb, commonly in the 12- to 24-inch range depending on door weight and use. Heavy doors, high-traffic openings, and doors subject to cart or equipment impact need anchors at the tighter end of that range. When in doubt, add an anchor between existing points rather than upsizing a single fastener.
Step-by-Step Installation Sequence for Base and Snap-In Anchors
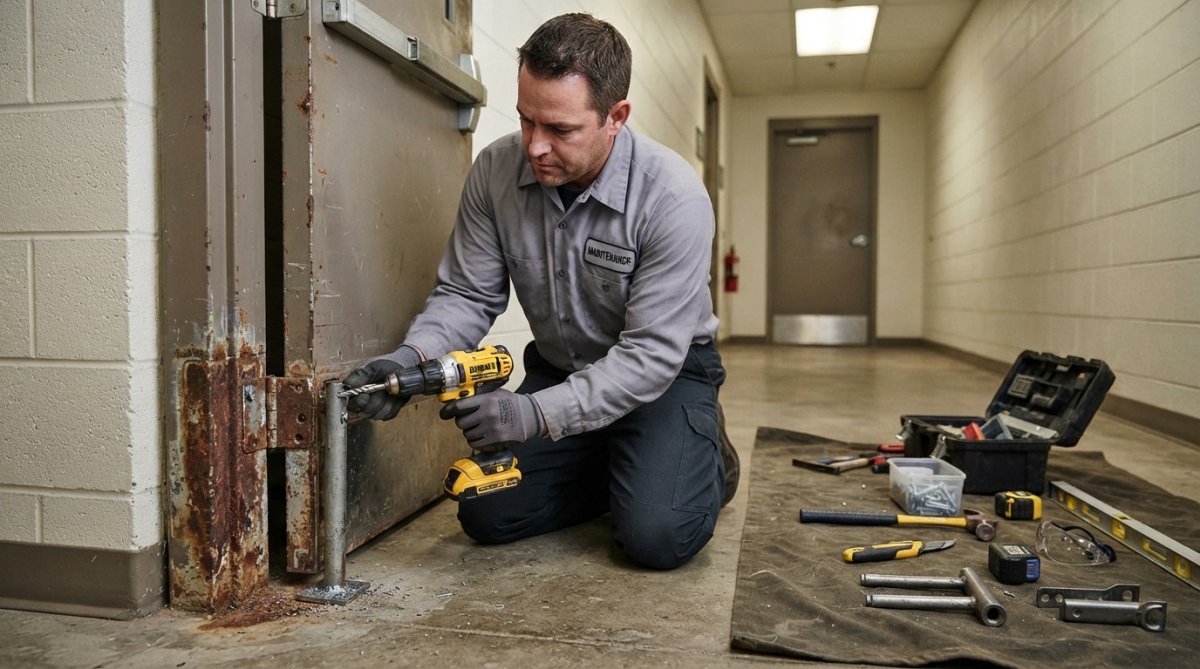
The installation sequence runs from the base anchor upward, then finishes with snap-in anchors along the jamb. Follow the order; skipping ahead throws off your leveling. The sequence below works for both new frames and retrofits, with retrofit-specific notes where the steps differ.
New Construction vs. Retrofit: What Changes
On a new frame, you set the frame, shim it, and anchor it before the door is hung. On a retrofit, the door is already in the opening and often still in service. That changes the order of operations:
- Support the door before you loosen anything. On a retrofit, prop the door or remove it from the hinges so its weight isn't hanging on a jamb you're about to re-anchor.
- Work from the base up on both, but on a retrofit, expect the existing base anchor to be the one that failed. Inspect it first.
- Expect shim stacks to have compressed or fallen out on an older frame. You'll likely be re-shimming, not just re-anchoring.
The Sequence
- Verify the rough opening. Check the throat opening and jamb width against the frame before setting anything. On a retrofit, confirm the frame hasn't twisted in place, a twisted frame won't re-anchor straight.
- Set or inspect the base anchor first. This locks the bottom of the frame and gives you a fixed reference point. On a retrofit, if the base anchor is sound, leave it and build from there; if it's failed, replace it before moving up.
- Level and plumb the jamb. Use shims behind the frame at each anchor point, then check with a level. On a retrofit, remove old, crushed shims and replace them with fresh ones, compressed shims won't hold alignment.
- Mark and drill anchor locations. Space anchors evenly along the jamb, following the manufacturer's spacing. On a retrofit, offset new anchor locations from the old holes by at least the anchor diameter so the new fastener isn't sitting in a wallowed-out hole.
- Install snap-in anchors. Seat each one fully so the frame pulls tight against the shimmed surface. On a retrofit, if a new anchor spins in an old hole, move to a fresh location rather than over-tightening.
- Re-check square and alignment after every third anchor. Small drift compounds fast.
- Install the threshold and filler plates, then test the door swing. On a retrofit, rehang the door and check the latch, the swing, and the gap before you call it done.
Retrofit-Specific Tools
Retrofits need a few things a new-construction install doesn't:
- A flat pry bar to gently work a stuck jamb away from the wall without bending it.
- A stud finder or a thin probe to locate the structural stud behind an existing drywall wrap.
- A vacuum or a blow-out bulb to clear old debris and dust from existing holes before re-anchoring.
- Replacement shims in the same thickness range as the originals so alignment carries over.
For a frame that's already loose from corrosion, Door Innovation's Jamb Anchor kits are built for exactly this job. The Jamb Anchor Side Jamb Kit handles outboard jambs, and the Jamb Anchor Center Jamb Kit covers inboard jambs. Both come with hardware and instructions, and both are designed to re-anchor aluminum frames that have come loose from salts, water, cleaning solutions, or repeated impacts from carts and equipment.


Door Frame Repair Kits for Rusted Steel: When to Repair vs Replace
Rusted steel frames don't automatically need replacement. A repair kit makes sense when the corrosion is surface-level and the frame still holds its shape; replacement wins when the metal has thinned through or the jamb has twisted.
Run this decision before you order:
| Condition | Recommended Action | Why |
|---|---|---|
| Surface rust, frame still plumb | Repair with a jamb patch or anchor kit | Preserves the existing opening |
| Loose jamb from corrosion | Re-anchor with a bolt-on kit | Restores structural integrity |
| Metal thinned through at the hinge | Replace the frame section | Anchor won't hold in compromised steel |
| Frame twisted or out of square | Replace the frame | Alignment can't be shimmed back |
Commercial Door Frame Installation Best Practices for Shimming and Alignment
Shimming and alignment decide whether the door swings clean for the next decade. A frame that's plumb and square at install stays that way; one that's "close enough" works loose within a year.
- Shim at every anchor point, not just the corners
- Re-check plumb after tightening each anchor, not just at the end
- Leave shims slightly proud, then trim flush after final alignment
- Confirm the gap between door and frame is even top to bottom
Common Installation Mistakes and Visual Troubleshooting
Most anchor failures leave visible clues before they become a liability. Learning to read them saves a second trip.
- Door drags at the top corner: the hinge jamb has shifted out of plumb. Re-shim and re-anchor the hinge side.
- Visible gap at the strike: the frame is out of square. Check diagonals and reset the base anchor.
- Rust streaks below the anchor: water is tracking in behind the jamb. Address the seal and the anchor point together.
- Anchor spins without tightening: the substrate behind it has failed. Move to a fresh location or step up to a larger fastener.
- Frame flexes when the door closes: anchor spacing is too wide. Add anchors between the existing points.
Maintenance and Long-Term Inspection After Installation
A repaired frame holds up when it's inspected on a schedule. Building a simple walk-through into your existing facility rounds can help.
Check these quarterly:
- Anchor tightness at every point (a quick tug test)
- Plumb and square at the hinge jamb
- Rust or corrosion at the base and around anchors
- Door swing and latch alignment
- Threshold condition and any water tracking
Frequently Asked Questions
How do you secure a heavy duty door frame to a wall?
Secure a heavy duty door frame by first verifying the rough opening is plumb and square, then installing anchors at the hinge and strike jamb locations. For masonry walls, use expansion anchors or concrete screws. For steel stud construction, use welded anchors or heavy duty toggle bolts. Space anchors no more than 24 inches apart along each jamb. Always shim behind the frame at each anchor point to prevent deflection and maintain frame alignment.
What type of anchor is best for hollow metal door frames?
The best anchor depends on your wall substrate. For masonry, concrete screws or wedge anchors provide the strongest hold. For hollow metal frames in steel stud walls, welded anchors or snap-in anchors work well. Base anchors are ideal for floor-level security. If your frame has corroded anchor points, Jamb Anchor kits from Door Innovation re-anchor aluminum frames without full replacement. The Jamb Anchor Side Jamb Kit costs $119.00.
Can you replace door frame anchors without removing the entire frame?
Yes. If the frame itself is structurally sound but anchors have loosened or corroded, you can install new anchors into existing holes or drill fresh ones nearby. Door Innovation's Jamb Anchor Side Jamb Kit is designed specifically for this scenario, re-anchoring aluminum frames that have come loose from corrosion or impact. The kit includes anchors, hardware, and instructions for a repair that adds years of life to the existing door system.
What tools are required for professional door frame anchor installation?
You need a drill with masonry and metal bits, a level, shims, a tape measure, a wrench or socket set, and safety glasses. For masonry installation, a hammer drill and carbide bits are essential. For steel stud frames, self-tapping screws or a nut driver may be needed. A pry bar helps adjust frame position. Always have the manufacturer's installation instructions on hand, especially when using specialty repair kits.